Mastering Hyperliquid on DeFi Saver
We've already covered the new Hyperliquid integration on DeFi Saver, complete with feature-rich support from day one. We've also introduced our first-ever DFS Rewards campaign. But today, we're walking you through everything you need to know about mastering the Hyperliquid UI on DeFi Saver.
If you've spent any time in crypto over the past year, you've probably heard of Hyperliquid. The platform has quickly become one of the most popular perpetual futures exchanges in crypto, offering deep liquidity, low fees, and a trading experience that feels much closer to a centralized exchange than most on-chain alternatives.
At the same time, opening the Hyperliquid dashboard for the first time can feel overwhelming.
Between leverage, funding rates, order books, margin modes, TWAP orders, and advanced execution tools, a lot is going on.
In this guide, we'll walk through the entire Hyperliquid trading experience step by step using DeFi Saver's Hyperliquid integration. By the end, you'll understand how to:
- Bridge funds to Hyperliquid
- Move assets between Spot and Perp balances
- Navigate the trading dashboard
- Understand leverage and margin
- Open your first position
- Use advanced order types
- Manage and close trades
There's a lot to cover, so let's get started.
Funding Your Hyperliquid Account
Although you'll access Hyperliquid through DeFi Saver, it's important to understand that Hyperliquid runs on its own blockchain.
That means assets sitting on Ethereum cannot be used for trading until they're bridged to Hyperliquid. To deposit funds, go to the Hyperliquid dashboard and click on the Funds button.

Simply select the asset you'd like to bridge and enter the desired amount.
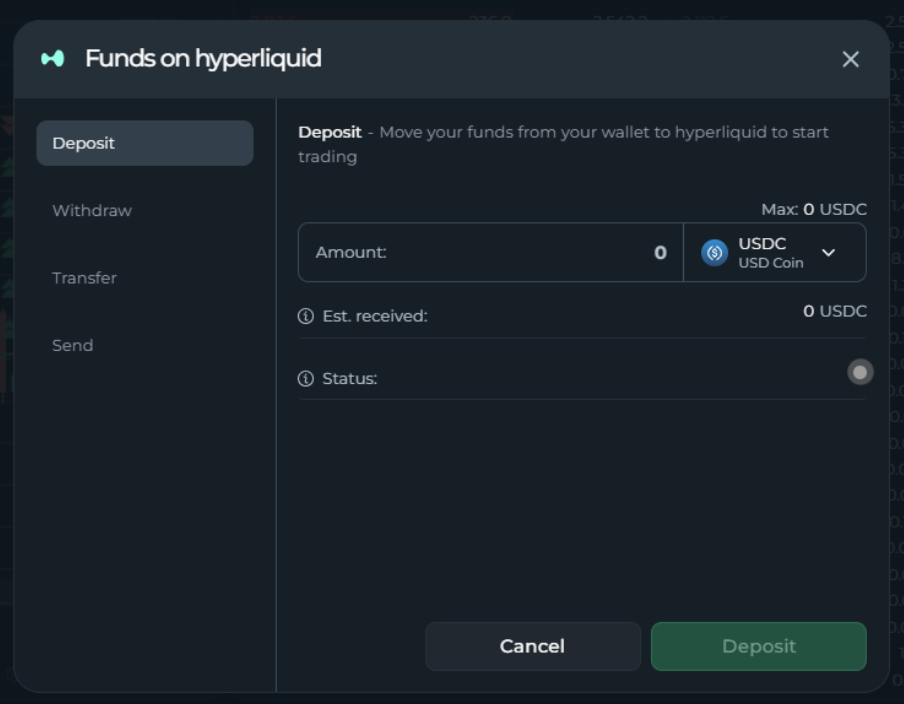
One advantage of using Hyperliquid x DeFi Saver is that you can bridge directly from Ethereum. On Hyperliquid itself, users have to bridge to Arbitrum before being able to deposit to Hyperliquid. Once the transaction is complete, your assets will appear in your Spot Balance.
Moving Funds to Your Perp Balance
Now, having assets on Hyperliquid isn't enough to start trading perpetual futures. Perpetual positions use a separate balance known as your Perp Balance.
To start, navigate to the Transfer tab and move funds from Spot into:
- Default DEX (crypto perpetuals)
- XYZ DEX (HIP-3 markets, which include commodities, stocks, FX, indices, altcoins)
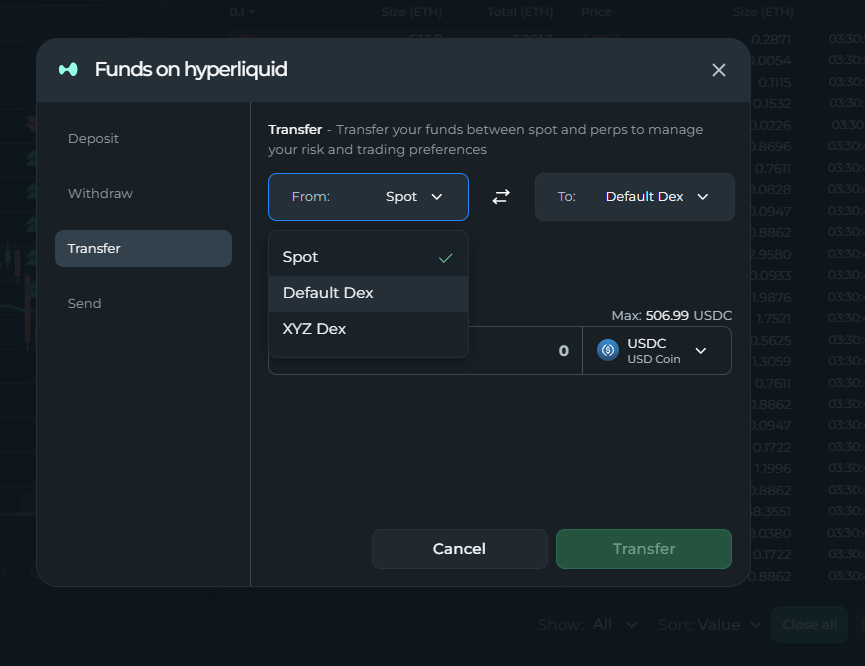
Once transferred, those funds become available as trading collateral.
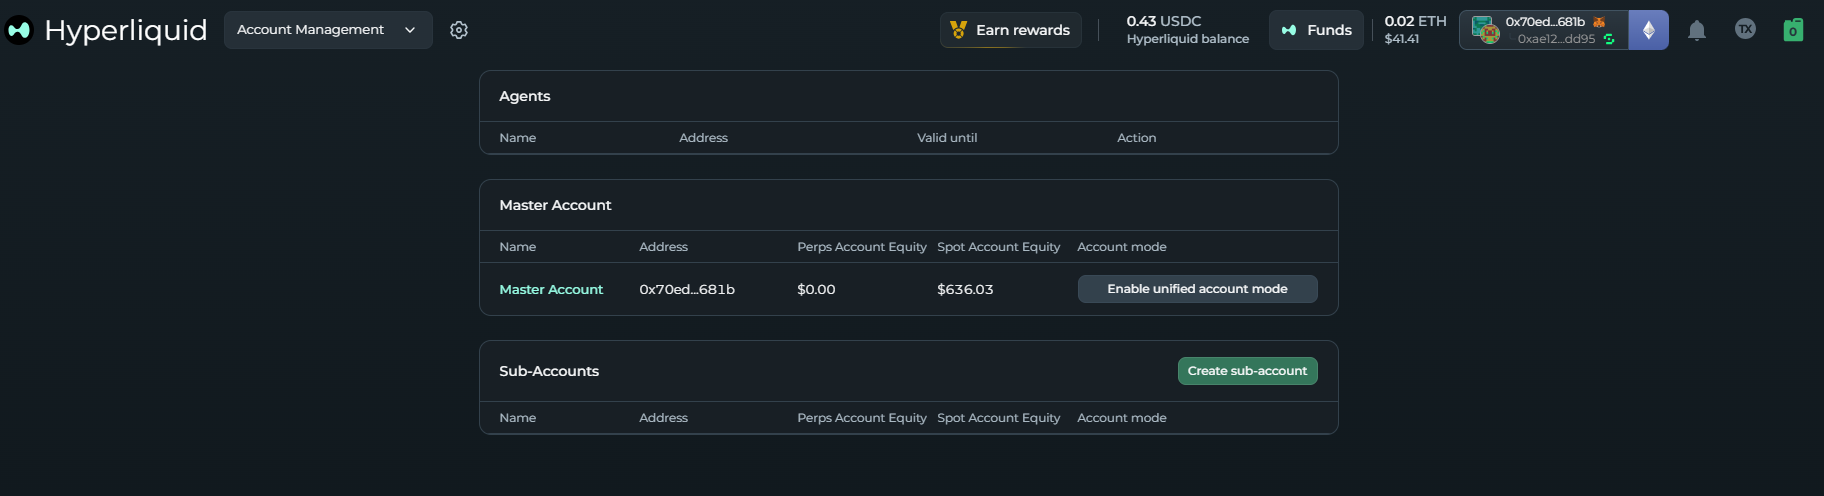
DeFi Saver also offers an option called Unified Account. When enabled, your Spot and Perp balances effectively share liquidity. Some traders prefer keeping balances separate for risk management, while others prefer a single pool of collateral available across all trading activity.
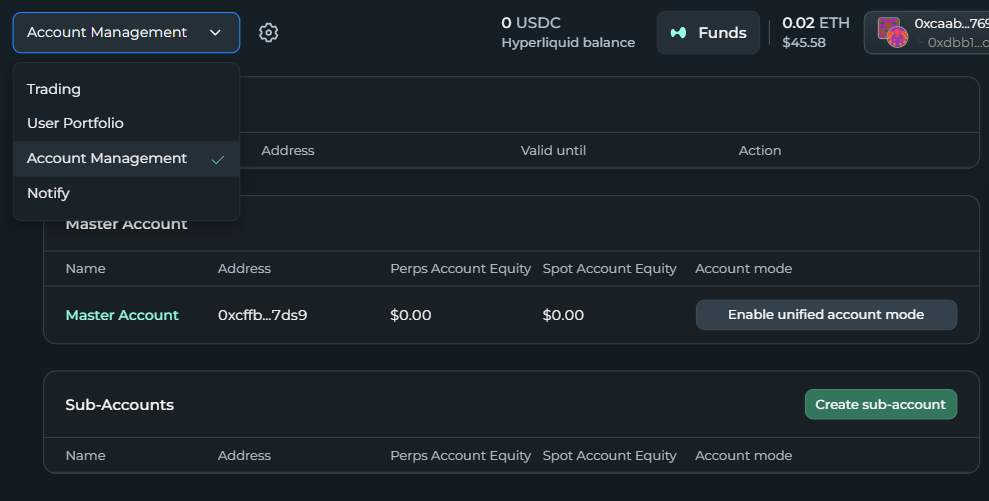
This option can be accessed via the dropdown menu in the top left corner of the dashboard. Choose the "Account Management" option, then click on "Enable unified account mode". Keep in mind that, in order to disable this mode, you will have to close all active positions.
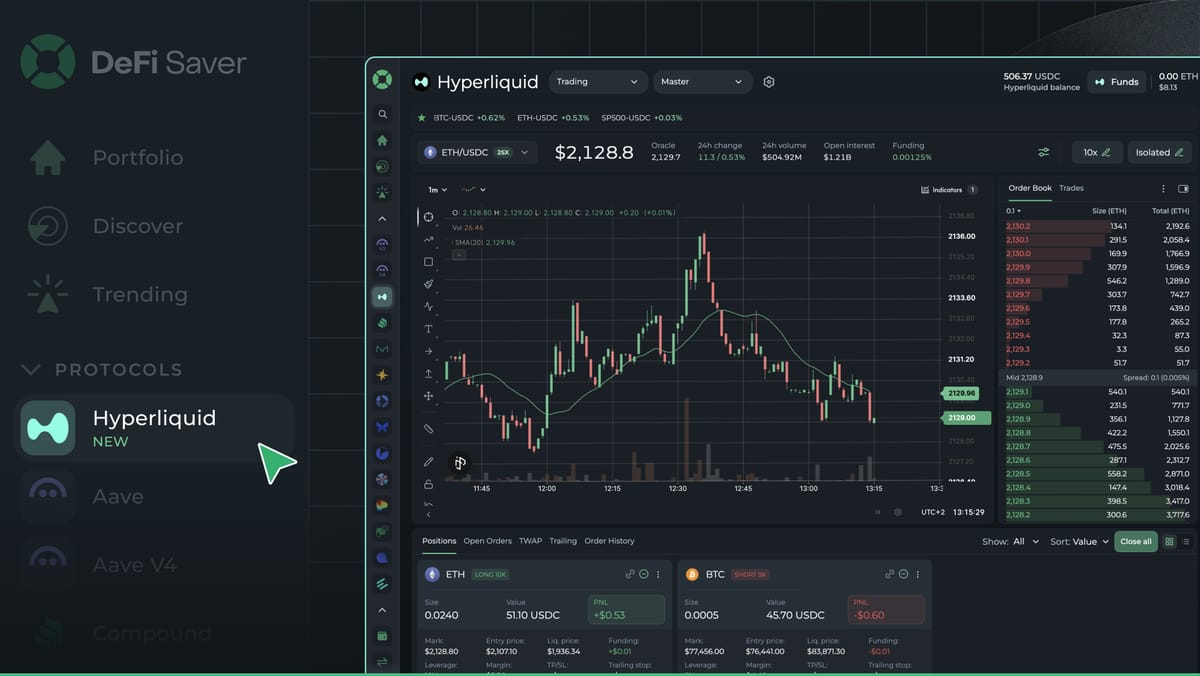
Understanding the Trading Dashboard
Before placing your first trade, it's worth understanding the key parts of the interface. You can switch between these key parts via the dropdown menu located in the top left corner of the dashboard.
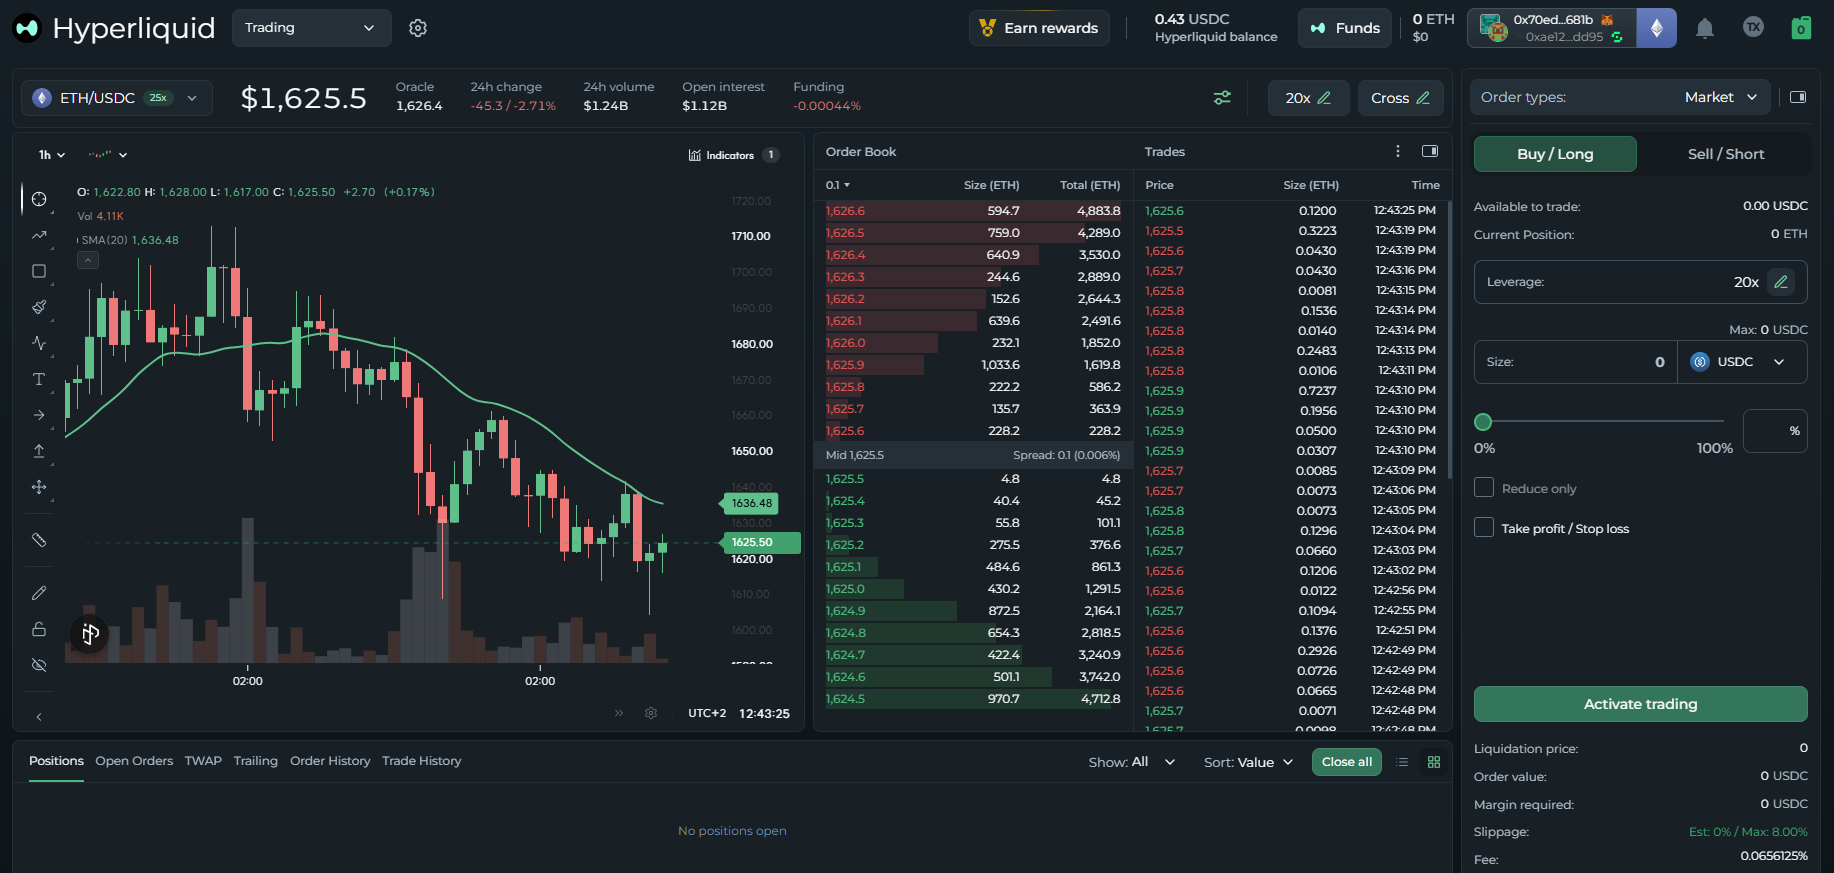
- The Trading view page is where you'll spend most of your time. This is where you select your target markets, analyze real-time price charts, manage active positions, and configure your execution tools.
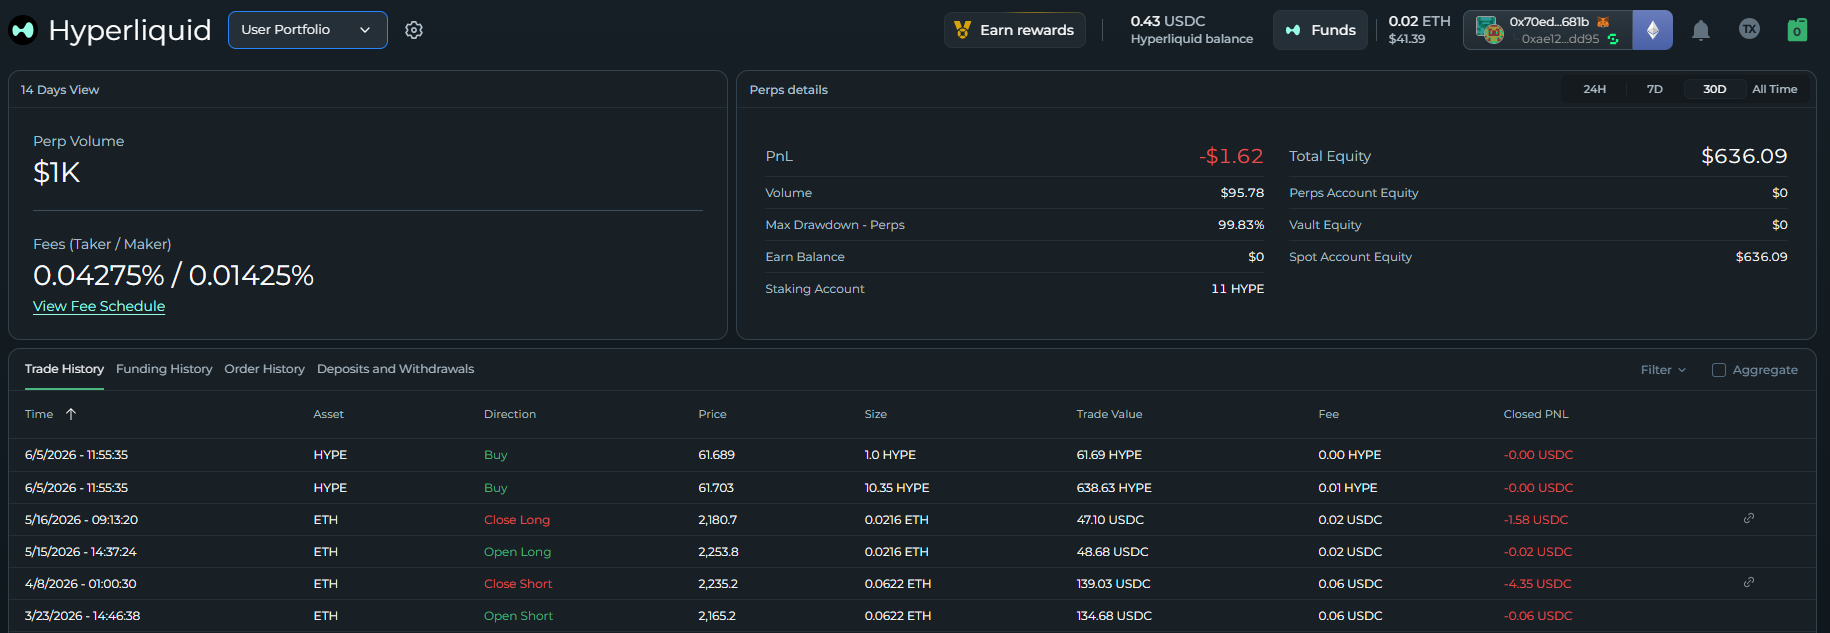
- The Portfolio section: Use this tab to track your net PnL, active trading volume, fees paid, and your complete transaction history.
- The Account Management section is your structural setup. This area allows you to create isolated subaccounts, toggle Unified Account mode, and configure HIP-3 DEX abstraction.
Subaccounts are especially useful if you want to separate trading strategies without creating entirely new wallets.
Some core perpetual concepts
Before placing your first trade, there are three critical components of the Hyperliquid ecosystem you need to get comfortable with.
Mark Price vs Oracle Price
One of the first things new traders notice is that Hyperliquid shows two different prices. The Oracle Price represents the broader market value of the asset, and it's sourced externally and acts as a reference point.
The Mark Price is the price Hyperliquid actually uses for:
- PnL calculations
- Liquidations
- Position valuation
Why? If Hyperliquid relied purely on perp market activity, large trades could temporarily distort pricing and trigger unfair liquidations. By incorporating oracle data, the Mark Price becomes significantly more resistant to manipulation.

Funding Rates and Open Interest
Open Interest represents the total value of currently open positions. Higher open interest generally indicates greater liquidity, participation, and trading activity.
Moreover, Funding Rates keep perpetual contracts aligned with the spot market.
If funding is positive, this means longs pay shorts. If funding is negative, it means shorts pay longs. Checking funding rates before opening a position can help you understand whether you'll be paying or receiving funding.
Cross vs Isolated Margin
Margin is the collateral backing your trade. The two available modes are isolated margin and cross margin.
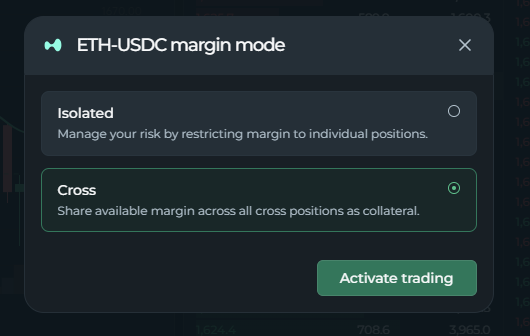
- Isolated margin means only the collateral assigned to that specific trade can be used. The primary benefit here is risk isolation: if the market moves violently against you, your potential losses are strictly capped at the amount you allocated to that specific trade. This is generally regarded as the safest approach for beginners.
- Cross margin, on the other hand, allows all available collateral in your entire account balance to dynamically back your active positions. The clear advantage is greater liquidation protection, as your trades have a much larger collateral cushion to absorb sudden market dips. However, the risk is significantly higher: a losing trade can consume your entire available account collateral.
Opening Your First Position
The simplest way to trade is with a Market Order.
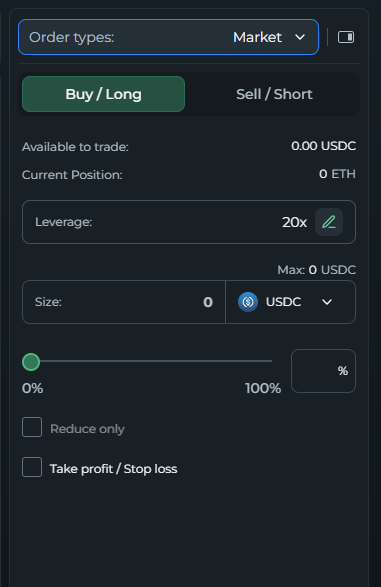
You simply:
- Choose Long or Short;
- Set leverage;
- Enter margin amount;
- Review liquidation price;
- Confirm the trade.
The position immediately opens at the best available market price.
Advanced Order Types
Now, if you are a more experienced trader looking for more sophisticated setups, here are some available options.
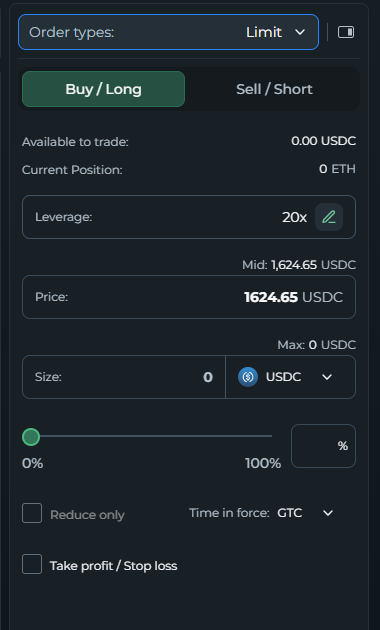
- Limit orders: You can enter the market only when the asset hits a specific, predetermined price target. Perfect for catching pullbacks.
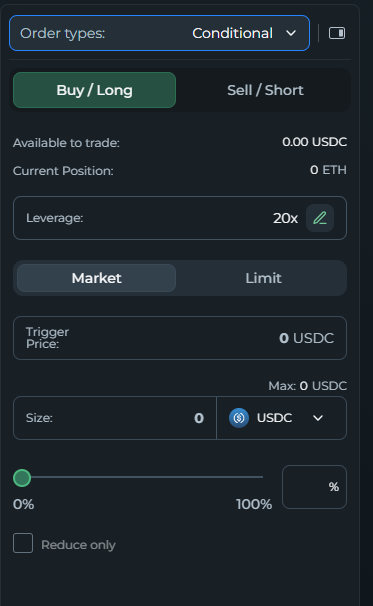
- Conditional orders: Similar to limit orders, but they remain completely invisible to the public order book until your specific trigger conditions are met.
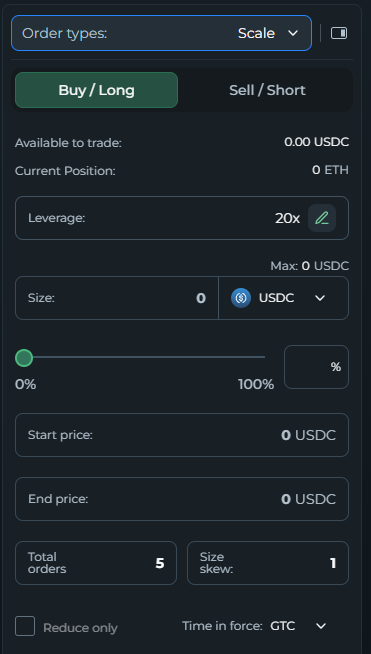
- Scale Orders: Automatically breaks down a large entry and spreads execution across a specified price range, reducing slippage and market impact.
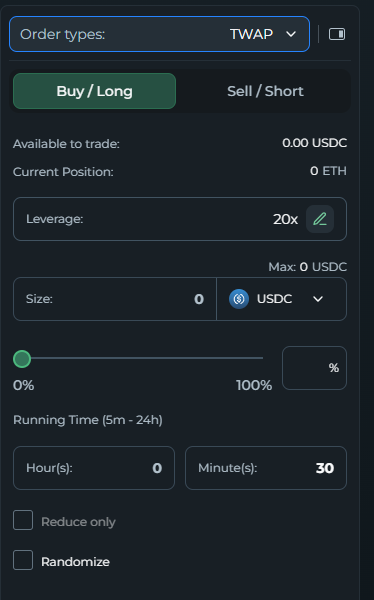
- TWAP orders (Time-Weighted Average Price): Automatically slices a massive order into smaller fragments executed over a set period (minutes or hours). This lowers slippage and front-running risk.
Trailing Orders (DeFi Saver Exclusive): Allows you to enter the market based on percentage shifts rather than price points.
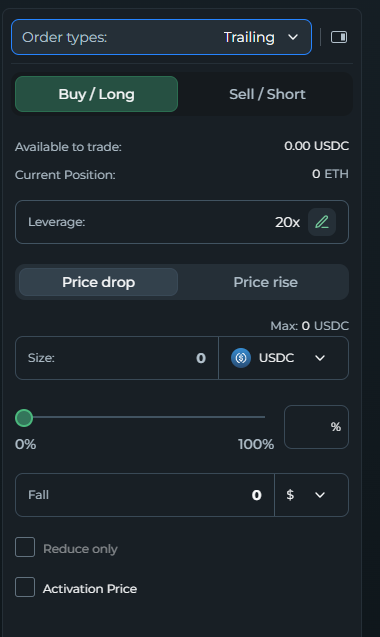
You can enter:
- After a rebound from a local low
- After a pullback from a local high
This creates more dynamic entry strategies that adapt to market movement.
Trailing Stop Loss
One of the most useful DeFi Saver-exclusive features is Trailing Stop Loss. Instead of setting a fixed exit price, the stop moves with the market.
For example: Imagine you open an ETH long at $2,100 with a 5% trailing stop. If ETH climbs up to $2,300, your stop loss automatically climbs right along with it, locking in a higher exit floor. Your position will only close if ETH drops 5% from its highest achieved level.
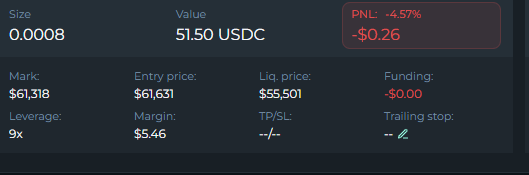
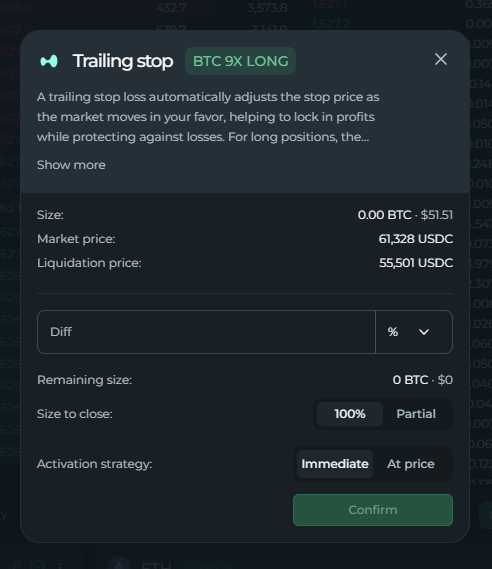
This prompts traders to stay in winning positions longer while still protecting profits. To use it, simply click on “Trailing stop” in the bottom-right of the position card:
This will open up the Trailing stop pop-up:
Some final takeaways
Hyperliquid offers a surprisingly advanced trading experience for an on-chain platform, and DeFi Saver expands that experience further with tools like Trailing Orders and Trailing Stop Loss.
While the interface may look intimidating at first, most traders only need to understand a handful of core concepts (such as margin, leverage, funding rates, order books and order types).
Once you're comfortable with those fundamentals, the more advanced tools such as TWAPs, Scale Orders, and Trailing automation become much easier to use effectively. And that's when Hyperliquid starts feeling less like a complicated trading platform and more like a flexible toolkit for executing your own trading strategies.
And, as always, if you need any help or have questions related to Hyperliquid on DFS, our support guys are always around to help out via our Discord server.
Stay connected:
📢: Official Twitter/X